OTHER BAKES - Cookies/Biscuits/Bars/Crackers/Scones
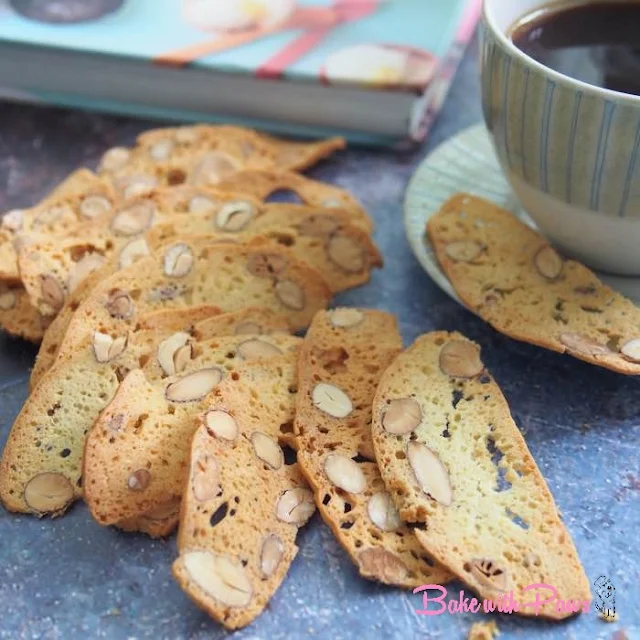
Crispy Almond Biscotti
January 12, 2022
| Recipe by Bake with Paws
Scroll to the bottom of the page for "PRINT RECIPE" ⬇
Few years ago I shared an "Almond Hazelnut Cranberry Biscotti" recipe using only eggs whites. However, I found it can be a little hard even though it is nice and my hubby likes it that way. I am sharing an improved recipe now as "Crispy Almond Biscotti" using whole eggs this time. To be honest, I find this whole egg recipe yields a lighter crispier Biscotti. My family love it.
If you have any questions regarding this recipe or any other post, please leave me a comment in the “LEAVE A COMMENT” link and I will reply you as soon as possible. Do tag me on Instagram @Bakewithpaws if you attempt on this recipe.
How To Make Crispy Almond Biscotti
INGREDIENTS:
3 eggs (large size, about 60g++)
85g caster (I used organic sugar, blended in food processor until fine), please use more sugar if you prefer it sweeter.
1 1/2 tsp vanilla extract or paste
255g plain flour
1 1/4 tsp baking powder
1/4 tsp salt
180g whole almond, toasted
Utensils:
180g whole almond, toasted
Utensils:
2 baking trays
METHOD:
1st Bake
METHOD:
1st Bake
- Preheat oven to 170C (top & bottom heat) or 150C (fan-forced). Line a baking trary with parchment paper.
- Sift flour and baking powder together in a bowl, add in salt. Set aside.
- Whisk egg until foamy with electric mixer. Add in sugar and whisk until fluffy.
- Add in vanilla extract/paste and whisk until well combined.
- Fold in the flour mixture with a spatula gently. Then add in the toasted almond. Gently mix until well mixed. The batter is very sticky.
- Divide batter into 2 portions and pour the batter into the prepared tray. Oil your both hands and scrapper. Shape each batter into a oblong shape (about 3" X 8" with 0.75" height)
- Bake at preheated oven for 20 - 25 minutes or until light brown.
- Remove from oven and let it cool on wire rack. Once completely cool, wrap with cling film and keep in the fridge overnight or at least 4 hours before slicing. It is better to keep it refrigerated over night for easier slicing.
- Preheat oven to about 140C - 150C (top & bottom heat) or 120C - 130C (fan-forced) and line the baking trays with non-stick baking paper.
- Remove loaf from fridge and slice as thinly as you can. Thin slices are crispier. I sliced it about 1.5mm - 2mm thick). It is better to use a very sharp or serrated knife. I used slicing cleaver. Please watch the video above "How To Slice Thin Biscotti"
- Spread the biscotti on the prepared baking trays and bake again at preheated oven for about 10 - 15 minutes or until crisp, dried and light brown. Flip the biscuit over halfway through baking.
- Remove from oven and leave to cool completely on a wire rack before storing in an airtight container.
Do note that the baking temperature and timing provided are what works for my oven and should also be regarded as a guide only. Every oven behaves a little differently, so please adjust accordingly for your oven.


Love it will try for this CNY
ReplyDeleteThank you for reading this recipe. Hope that you will like it too.
DeleteGong Xi Fa Cai!
Hi, can I use some species like cinnamon, ginger, nutmeg?
ReplyDeleteHi, thanks for visiting Bake with Paws. It is totally up to you and how you like the taste to be.
DeleteCheers and happy baking:)
Hi, can these be made ahead and frozen?
ReplyDeleteHi, thank you for your interest in this recipe. I think no need to freeze. Just store in the airtight container once cool down and keep in the fridge will do.
DeleteCheers :)